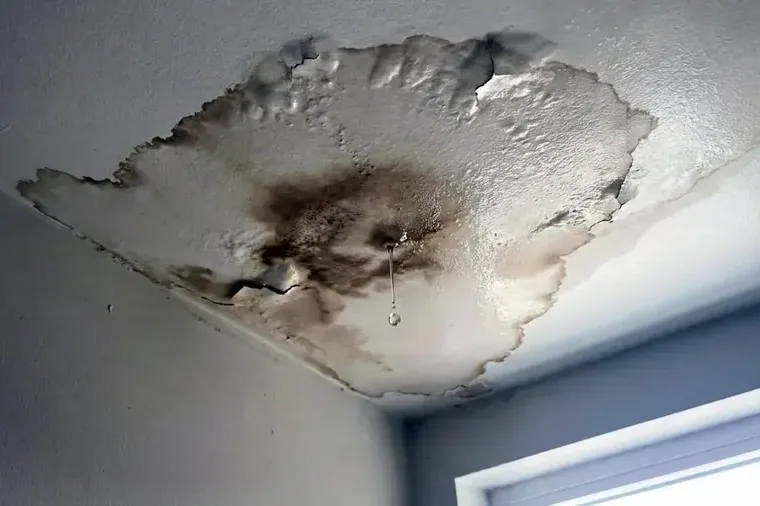
A severe storm brought very large hail to Salado Oaks Drive in April 2024. After roof damage, rain can travel along framing and collect above a ceiling before the first drip reaches the room.
Key takeaways
- People and pets should stay clear of sagging ceilings and wet fixtures.
- Exterior roof findings and interior moisture findings need separate records.
- A ceiling stain may appear away from the actual opening.
- Sagging finishes and wet fixtures require a controlled room below.
- Drying ends from readings in retained materials, not from clear weather.
The first steps when a ceiling starts dripping
A sagging ceiling needs a clear space beneath it. Occupants should keep away from the wet finish and nearby electrical fixtures, leaving access and water removal to the appropriate professionals.
Photographs from a dry position can record the stain, dripping and belongings below.
A roof professional inspects the exterior and arranges temporary protection or repair. Inside, restoration technicians trace damp insulation, framing and ceiling finishes. Coordinating those visits helps stop new rain entry while the existing moisture is located and removed.
- Keep the room below a sagging ceiling clear.
- Arrange roof inspection and source protection.
- Record active drips and wet contents from a safe position.
Roof repair and interior restoration are separate
A qualified roof professional identifies and protects the exterior opening. Restoration personnel document whether entry is controlled, then inspect insulation, framing, ceiling finishes and contents below.
The Salado roof leak page describes this coordination. Drying cannot remain dependable while rain continues entering, but the roof repair itself is not restoration work.
- Photograph exterior findings when safely available.
- Record temporary protection status.
- Keep roof repair documents with the source record.
- Map interior materials independently.
Why stains do not point straight upward
Water can travel along decking, rafters, fasteners or insulation before reaching the ceiling face. The first indoor mark may sit away from the exterior opening.
Personnel follow the route from accessible attic materials into upper walls and ceilings. Current readings distinguish damp material from older discoloration.
- Mark the stain edge.
- Check insulation beyond the visible spot.
- Inspect framing turns and penetrations.
Following moisture beyond the stain
The inspection follows damp materials into nearby ceiling bays and upper wall sections. A narrow mark on the painted surface can sit beneath a wider area of wet insulation, so readings and safe cavity access help determine the drying setup.
Protecting the room under a wet ceiling
Sagging drywall can lose strength, and water near a light or fan can present an electrical concern. Occupants should keep clear and avoid puncturing the finish.
The Salado ceiling leak page covers controlled access from a safe position. Appropriate electrical clearance comes before treating fixtures as part of an ordinary cavity.
- Move people away from the overhead area.
- Do not puncture a sag.
- Avoid wet switches and fixtures.
- Photograph the room from a dry route.
Material decisions inside the attic assembly
Wet insulation can hold water against wood and restrict evaporation. Its type, saturation, contamination and access affect whether it can remain.
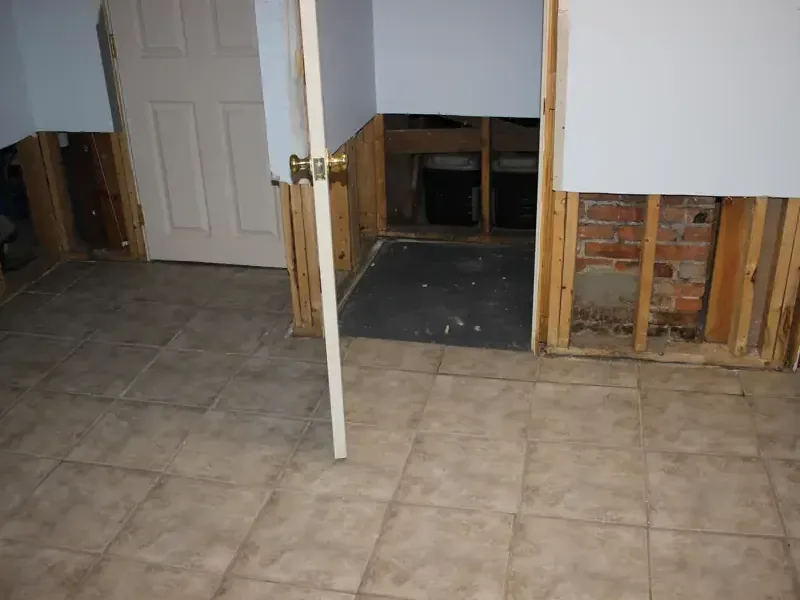
Ceiling drywall may require selective removal while sound framing stays for measured drying. Each material receives its own condition record rather than one room wide decision.
- Inspect decking, framing and insulation separately.
- Record the back of the ceiling finish.
- Expose retained wood for airflow.
- Protect the floor below opening work.
Closing the interior after weather entry
Air movement and dehumidification address exposed retained materials. Technicians revisit fixed points in framing and finish layers, adjusting equipment when one zone responds differently.
The main roof leak page adds process context, while the Salado service hub lists storm, flood and plumbing cleanup for other sources.
- Confirm exterior control remains stable.
- Compare like materials with dry references.
- Preserve daily equipment notes.
- Begin finish repair after closing results.
Building an overhead moisture map after exterior inspection
After the exterior inspection, technicians map the wet materials inside. Starting points can include damp decking, compressed insulation, a wet ceiling face and contents below.
Each point is labeled by location and material so later readings return to the same place and show whether drying is progressing.
Safe access can change the known boundary. Removing a small section of unsalvageable ceiling may expose dry framing on one side and wet insulation on another.
The file should preserve that contrast because it supports a targeted drying setup instead of broad removal based only on weather severity.
Daily monitoring then follows the retained materials. A ceiling face may improve quickly while upper framing changes slowly, especially where insulation or a tight cavity restricts evaporation. Equipment adjustments should respond to those results and remain documented beside the original points.
The interior record includes stain edges, active drips and readings from accessible cavity materials. Exterior notes show whether the entry opening is temporarily protected or repaired.
During drying, technicians check that protection remains effective and record any new water entry before changing the equipment arrangement. Furniture, floor seams and wall bases beneath the ceiling also need inspection.
A small overhead opening can wet a wider area on the floor, especially when water runs off furniture or follows the edge of a rug. These lower surfaces receive their own photographs and measurement points.
Damp contents are separated from dry belongings, with labels recording where each item came from and where it is stored. At the final visit, the owner receives the closing readings and a list of finish repairs still needed.
Roof repair records stay with the project file so the next trade can see the source work and the interior work together.
- Start with exterior source findings and interior observations.
- Label decking, framing, insulation and finishes independently.
- Photograph conditions revealed by selective access.
- Adjust equipment from material trends rather than stain size.
Contents below need their own assessment
Furniture, flooring and stored items beneath a leak can receive dripping water even when the ceiling damage stays small. Each item group should be photographed and protected, cleaned or evaluated according to contact and material rather than the roof diagnosis alone.
- Protect dry items before opening work.
- Record contact on floor finishes.
- Keep debris away from unaffected contents.